Let’s be honest—trimming your cat’s nails probably ranks somewhere between “mildly stressful” and “requiring full protective gear” on your list of favorite activities. But here’s the good news: with the right preparation and technique, you can transform nail trimming from a dreaded battle into a manageable routine. Some cats will never exactly love it, but most can learn to sit through it without turning into furry tornadoes of claws and teeth.
Why Regular Cat Nail Trimming Matters
Think about how cats in the wild maintain their claws. They climb rough tree bark, dig through soil, hunt across uneven terrain, and scratch on countless textured surfaces. Your indoor cat? They pad across carpet and hardwood, maybe scratch their post a few times, and that’s about it.
Without those natural filing opportunities, indoor cat claws keep growing. Eventually, they curve downward enough to puncture the paw pad itself—imagine walking around with needles stabbing your feet with every step. I’ve seen cats develop serious infections from nails that grew completely into their pads, requiring antibiotics and sometimes minor surgery to fix.
There’s also the “caught claw” problem. Long nails snag on blankets, get wedged in carpet fibers, and catch on furniture fabric. When your cat pulls away suddenly, the nail can tear partially or rip out completely. That’s an emergency vet visit waiting to happen, usually at 2 AM on a Sunday.
Senior cats face extra challenges here. Arthritis makes scratching uncomfortable, so they do it less often. Meanwhile, their nails keep growing at the same rate. Check an older cat’s paws, and you’ll often find seriously overgrown claws simply because they’ve reduced their natural maintenance behaviors.
Beyond health reasons, cat claw care protects your stuff and your skin. Trimmed nails still scratch furniture—but they cause dramatically less damage. When your cat makes biscuits on your lap, you’ll appreciate those rounded tips instead of needle points. Playing with kittens becomes far more enjoyable when they’re not equipped with tiny daggers.
For indoor cats, plan on trimming every two to three weeks. Outdoor cats often go longer between trims since they wear down claws naturally, though you should still monitor them monthly.
Tools You Need for Cat Nail Trimming
Walk into any pet store, and you’ll face a wall of nail trimming options. Here’s what actually works:
| Clipper Type | Works Best For | Price Range | What Makes It Good | Potential Drawbacks |
|---|---|---|---|---|
| Scissor-style | Anyone new to this, cats under 12 pounds | $8-$15 | You can see exactly where you’re cutting, handles feel familiar | Thicker nails on large cats can be tough to cut through |
| Guillotine | Medium to large cats, people who’ve trimmed nails before | $6-$12 | Makes quick work of thick nails, one smooth motion | You’re estimating the cut position rather than seeing it clearly, blades dull faster |
| Electric grinder | Cats who don’t spook at sounds, perfectionists | $20-$40 | Nearly impossible to hit the quick, gives professionally smooth edges | The noise and vibration terrify some cats, each nail takes longer |
Beyond the clippers themselves, gather these items:
Styptic powder or plain cornstarch: When (not if) you eventually nick the quick, these stop bleeding in seconds. Styptic powder contains aluminum sulfate and works fastest, but regular cornstarch from your pantry does the job in about 30 seconds longer.
Bright, focused lighting: You need to see clearly inside those nails. A clip-on book light works great. Smartphone flashlights work in a pinch but require a third hand.
Really good treats: Save something special exclusively for nail time. Freeze-dried salmon, squeeze-tube treats, or tiny pieces of cooked chicken. Whatever makes your cat lose their mind with excitement.
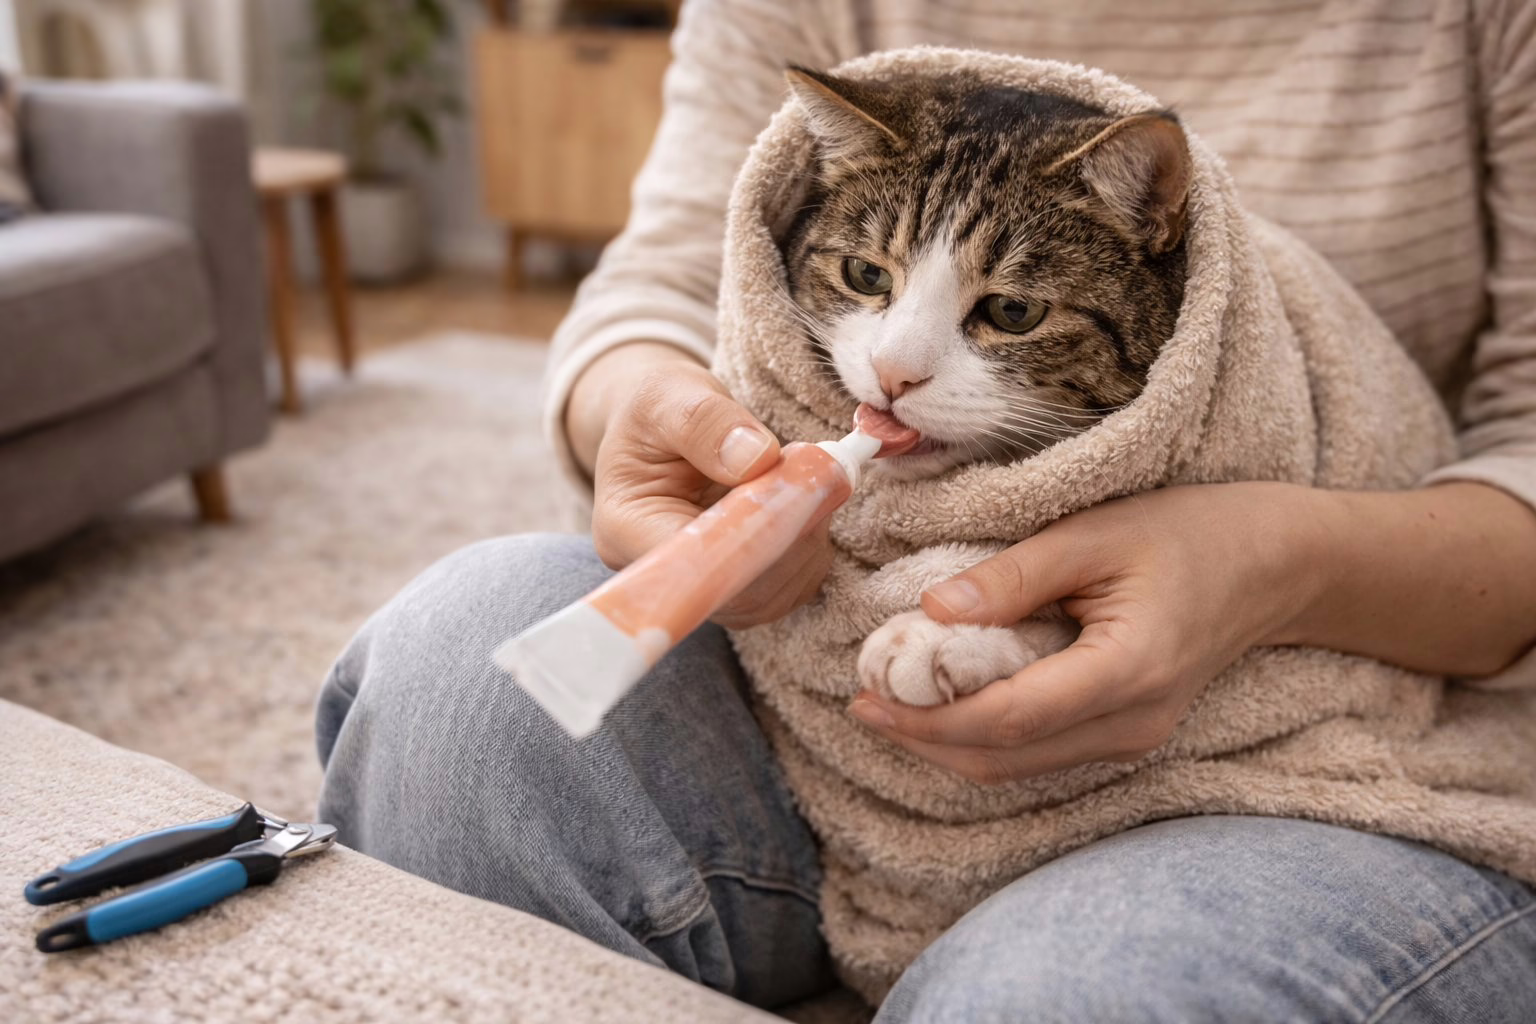
A medium towel: For making a “burrito wrap” when needed. Beach towels are too bulky, hand towels too small. A standard bath towel works perfectly.
Replace your clippers once the blades start crushing nails instead of slicing cleanly through. This usually happens after 12-18 months of regular use. Dull blades hurt, and cats remember pain.
Preparing Your Cat for Nail Trimming
You can’t just grab your cat, pin them down, and start clipping. Well, you can, but you’ll do it exactly once before your cat develops permanent nail-trimming PTSD.
Begin by making paw touches completely normal during relaxed moments. While your cat’s eating dinner, gently touch a paw. When they’re purring in your lap, rub their toe beans. Give a treat immediately after. Do this 5-10 times daily for a week. Just touching, nothing else.
Next week, add gentle pressure that makes the claws extend. Press the pad, claws pop out, release immediately, give treat. Your cat should barely notice this happening. Continue until they genuinely don’t care about the paw handling.
Now introduce the clippers—but don’t cut anything yet. Let your cat sniff them. Touch the clippers to a paw, instant treat. If you’re using a grinder, turn it on across the room during treat time so the sound becomes associated with good things. Do this for several days.
Only after all this preparation should you attempt an actual trim. Choose your moment carefully. Right after your cat has eaten and is drowsy? Perfect. After an intense play session when they’re tired? Excellent. When they’re hungry, zooming around, or already irritated? Terrible idea.
Location matters too. Some cats do best on a table at their eye level. Others prefer sitting in your lap. A bathroom with the door closed prevents escape attempts and limits distractions. Experiment to discover your cat’s preference.
I tell my clients that trimming just one nail per day is perfectly fine during the learning phase. You’re building a foundation for years of future trims. Rushing this process to save time today costs you months of trust-rebuilding later.
Dr. Jennifer Coates, DVM, Advisory Board Member, Pet Life Today
Step-by-Step Cat Nail Trimming Process
Positioning and Holding Your Cat
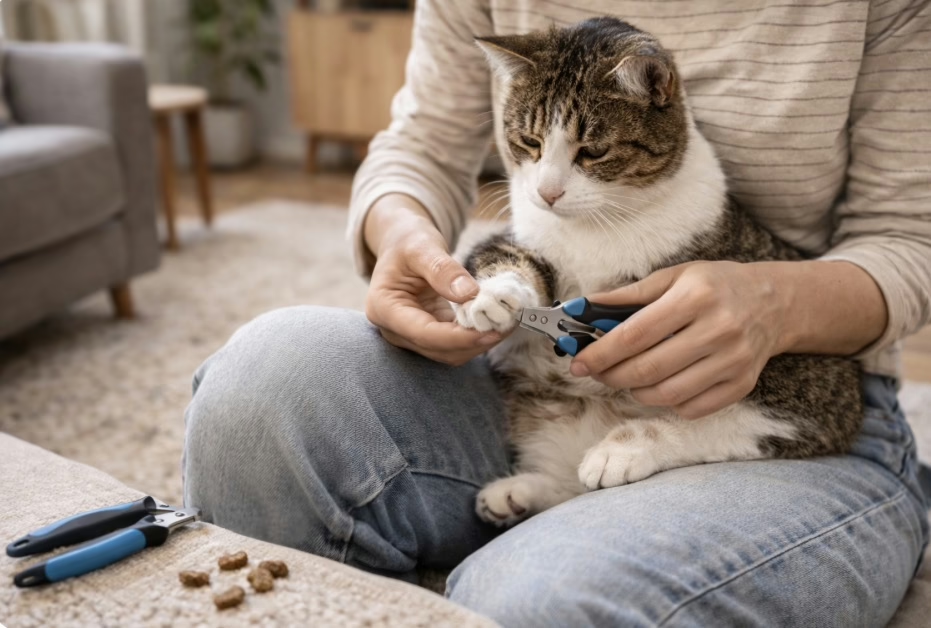
For cooperative cats, try the lap method: your cat sits in your lap facing away from you. Tuck them gently against your body with your non-dominant arm, using that hand to hold and manipulate their paw. Your dominant hand controls the clippers. This position feels secure to cats while giving you excellent control.
Squirmy cats often need the towel burrito. Spread a towel flat, place your cat in the center, and wrap firmly (not tightly) with one paw sticking out. This prevents your cat from using their other three paws as weapons while you work on paw number one. Unwrap and rewrap to access each paw.
Got a really difficult cat? Recruit a helper. One person provides gentle but firm restraint and offers soothing words. The other focuses entirely on the trimming. Partners or older kids work great for this. The person doing the restraining should stand behind or beside the cat, never in front where the cat can see them and try to escape toward them.
Identifying the Quick and Where to Cut
Inside each nail, the quick contains blood vessels and nerve endings. On white or translucent nails, it looks like a pink triangle or line running partway down the nail. Cut into it, and you’ll have blood, pain, and one very unhappy cat.
Black or dark nails make this much harder—you can’t see through them. You’ll need to estimate based on the nail’s natural curve and thickness.
Hold the paw firmly but not in a death grip (cats hate that). Press the pad until the claw extends completely. Look at the nail from the side. Notice where it curves downward? The quick typically ends right before that curve starts. Plan to cut about 2 millimeters before where you see pink, or right before the curve on dark nails.
When you’re unsure, cut less. Taking tiny tips off every week beats risking the quick and creating a traumatic experience. You’re removing the sharp point, not trying to cut as short as possible.
Making the Cut Safely
Hold the clipper perpendicular to the nail—straight across, not angled. Angled cuts can split the nail or create sharp edges. With scissor-style clippers, position them so the cutting blade faces toward you and you’re looking down at where you’re cutting. For guillotine clippers, insert the nail tip through the circular opening with the blade side toward the nail’s end.
Make one confident cut. Squeezing slowly or making multiple tentative snips crushes the nail instead of cleanly slicing it. You want to hear a crisp “snip” sound. Crunching or grinding sounds mean your blade’s too dull.
If your cat tolerates it, great—do all four paws in one session. If they’re getting stressed after one paw, stop there. You can do another paw tomorrow. Some cats need a one-nail-per-day approach, and that’s completely fine. Consistency beats speed every time. Always end with treats and praise, even if you only managed a single nail.
What to Do If You Cut the Quick
Eventually, it’ll happen. You’ll misjudge the angle or your cat will jerk at the wrong moment, and suddenly there’s blood. Your cat will yowl and try to escape.
First: stay calm. Seriously. Your cat reads your emotional state like a book. If you panic, they’ll panic harder.
Grab your styptic powder and apply it directly to the bleeding nail tip with firm, steady pressure. Hold it there for a full minute—longer if bleeding continues. Don’t keep checking every few seconds; that breaks the clot forming. No styptic powder? Cornstarch or all-purpose flour works similarly, though it takes 90-120 seconds instead of 60.
After bleeding stops, keep your cat calm and confined for 15 minutes. Running around can restart bleeding. Offer their favorite treats and speak soothingly. Most cats forgive quickly, especially if treats are involved.
Watch the nail over the next 24 hours. A little tenderness is normal. Excessive licking, limping that lasts beyond a day, or any swelling warrants a vet call. Infections are rare but possible.
After cutting the quick, expect your cat to be more resistant next time. You’ll likely need to restart the desensitization process, building back up to their comfort level. It’s frustrating, but pushing too hard too soon creates long-term problems.
Handling Difficult or Anxious Cats During Nail Trimming
Some cats never become nail-trimming enthusiasts. That’s reality. But you can reduce their stress significantly.
Gradual conditioning works wonders for anxious cats. Week one: just touch paws with treats, no clippers involved. Week two: introduce clippers (still no cutting). Week three: attempt one nail. Week four: maybe do two nails. This sounds painfully slow, but it’s faster than battling a terrified cat every three weeks for years.
Two-person trimming helps with cats who squirm constantly. One person holds the cat securely—using a towel wrap if necessary—while speaking calmly. The second person handles the clippers. Switch roles if your cat responds better to a particular person doing the actual cutting. My cat tolerates trimming only when my partner holds him; he fights me if our roles reverse.
Distraction techniques work on some cats. Spread wet food or pureed treats on a lick mat. While your cat’s intensely focused on licking, trim away. This buys you maybe 30-60 seconds of cooperation—enough for a few nails.
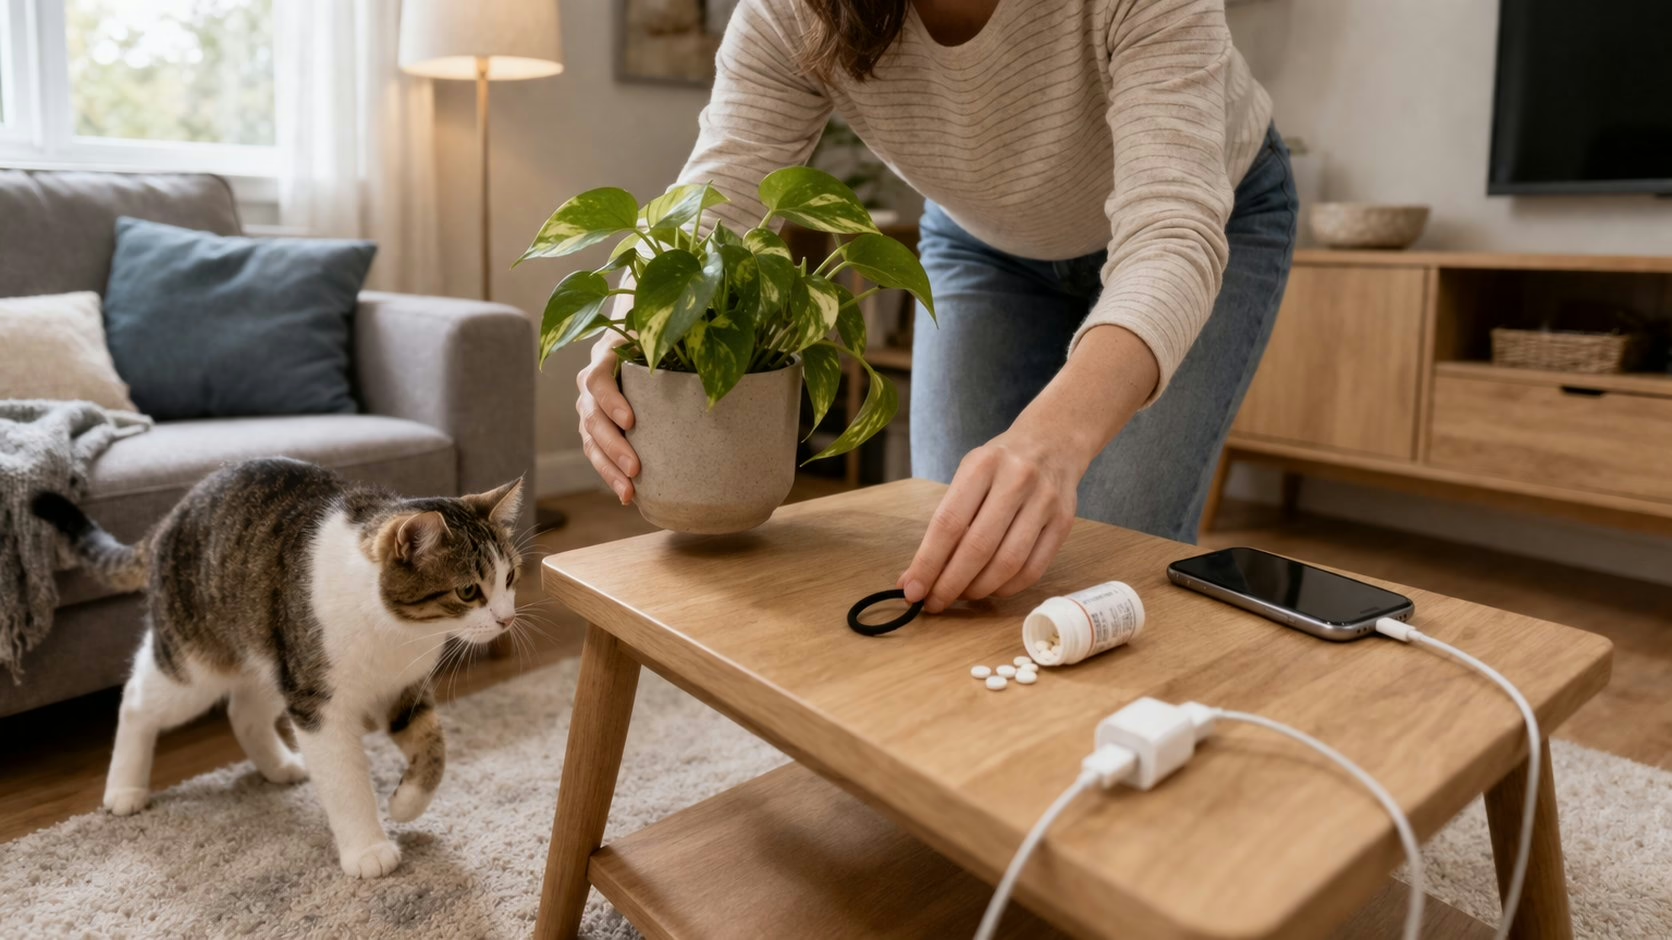
Gabapentin (a prescription anti-anxiety medication) helps genuinely terrified cats. Your vet can prescribe a dose to give 2-3 hours before trimming. It doesn’t sedate them, just removes the panic response. Most cats don’t need this, but for severely anxious ones, it’s life-changing.
Know when to outsource. If nail trimming is destroying your relationship with your cat, causing aggressive behavior, or making you dread the task for weeks, get professional help. Many cats behave better for groomers or vet techs than their owners. It’s not a failure—it’s recognizing what works best for your situation.
Mobile groomers who come to your house split the difference—professional expertise without the car ride and clinic stress.
Common Cat Nail Trimming Mistakes to Avoid
Getting too ambitious with how much you cut causes the majority of quick injuries. You can always trim more next week. You can’t un-cut a nail that’s bleeding and painful. Conservative trimming might mean more frequent sessions, but it’s dramatically safer.
Using whatever clippers are handy creates problems. Yes, human nail clippers work on tiny kittens in emergencies. For adult cats? They’re the wrong shape and lack sufficient strength. They’ll crush the nail instead of cutting cleanly, which hurts. Dog nail clippers are often oversized for cat nails, making precision impossible. Cat-specific clippers cost $8-15 and make everything easier.
Wrestling an unwilling cat into submission destroys trust and makes every future attempt harder. If your cat’s fighting seriously, stop. Try again tomorrow or later that day. Forcing the issue by restraining a panicked cat risks injury and creates lasting negative associations. You want your cat to tolerate nail trims, not develop a phobia.
Trying to do all nails when your cat’s clearly stressed sets unrealistic expectations. Nobody says you must complete all four paws in one session. I know cats who get one paw trimmed per day for four days. That’s fine! Your cat’s emotional state matters more than efficiency.
Forgetting about dewclaws leads to overgrowth issues. These small claws on the inner leg don’t contact the ground during walking, so they never wear down naturally. Left untrimmed, they can curve around and grow into the leg. Check them every time and trim as needed.
Not practicing with kittens early wastes a golden opportunity. Kittens who learn that paw handling is normal and treat-worthy become adults who sit calmly for nail trims. Start this training around 8-10 weeks old, well before their nails actually need trimming.
FAQs
For typical indoor cats, you’re looking at trims roughly every 14-21 days. Cats who aggressively use scratching posts might stretch this to 4 weeks. Rather than following a rigid schedule, check nails weekly by looking at them. Are they curving toward the paw pad? Catching on fabric when your cat walks across blankets? Time for a trim. Older cats with arthritis often need more frequent attention because they’ve reduced their scratching activity, allowing faster nail growth.
In a genuine emergency with a tiny kitten, sure. For regular trimming of adult cats? Not really. Cat nails have a rounded shape and density that human clippers aren’t designed to handle. Instead of making a clean cut, human clippers tend to crush and split the nail, causing discomfort and creating rough edges. Cat-specific clippers cost less than a fancy coffee and make the job significantly easier and safer for your cat.
You’ll know immediately. Blood appears at the nail tip, your cat jerks their paw back forcefully, and they’ll usually vocalize—anywhere from a sharp meow to a genuine yowl depending on their personality. With light-colored nails, you can see the pink quick before cutting and avoid it. Dark nails require more guesswork; watch for where the nail begins curving downward and cut before that point. The texture inside dark nails also changes—the quick area looks slightly different than the dead nail tip.
Outdoor cats file their nails naturally through climbing trees, walking on concrete and asphalt, hunting, and scratching on rough outdoor surfaces. That said, check their nails monthly. Some outdoor cats still develop overgrowth, particularly on dewclaws that don’t contact the ground. Senior outdoor cats with reduced activity levels may need regular trims just like indoor cats. If your cat goes outside, avoid cutting nails extremely short—they rely on adequate nail length for climbing to escape predators and for self-defense if necessary.
Getting comfortable with cat nail maintenance takes practice, but most people develop confidence after 3-4 sessions. Your first few attempts might feel awkward or stressful. That’s completely normal. Remember that patience during training creates years of easier nail trims down the road. Start slowly, reward generously with high-value treats, and don’t hesitate to spread the task across multiple days. Your cat’s comfort matters infinitely more than finishing quickly. With consistent practice and positive reinforcement, nail trimming becomes routine cat claw care that maintains your bond rather than damaging it.